
How to Use Watercolour Tubes and Pans - Ultimate Guide for Beginners
Disclosure: This post may contain affiliate links. That means if you buy something we may possibly get a small commission at no extra cost to you.
Figuring out how to use watercolour tubes and pans is often not the first hurdle for beginners… It’s actually choosing what paint you need to begin with!
Here are the answers to the questions I get asked most often about how to get started with watercolour painting and everything a new painter needs to know about the kind of watercolour paint that comes in tubes and pans.
Please let me know if you have a question that I haven’t answered - I’d love to help!
Now, since this is an Ultimate Guide, we’ve got a lot to cover!
These links will take you directly to the relevant sections for your convenience.
Which is better - watercolour tubes or watercolour pans?
What type of watercolour paint should I choose?
How many colours do I need to start watercolour painting?
Can I paint straight from the tube or pan?
What kind of palette do I need to paint with watercolour tubes and pans?
How to start painting with watercolour
What do I do with leftover watercolour paint in my palette?
What characteristics of watercolor paint do I need to know about?
Which is better - watercolour tubes or watercolour pans?
If it is any consolation, I don’t think you can make a wrong choice between these two because the watercolour paint that comes in tubes and pans is very similar.
Tube watercolour contains more glycerin to keep its creamy soft consistency, for as long as it is sealed in the airtight tube. You can buy tubes in sets or individually giving you all the choice in the world when it comes to colours.
Pan watercolour is dry and hard and comes either in little individual white plastic containers (also called pans) or fixed into a palette box with a lid. If you buy a little set of pan watercolours in a palette box with a lid all you need is a brush and you are good to go… anywhere. This form of watercolor is very easily stored and transported.
With a fixed set you are stuck with the colours in the box. However you can also buy individual pans of watercolour (for the more professional brands) which you can clip into a palette box.
Neither one is better or worse, I believe that is more to do with the quality of the paint itself rather than its packaged form.
What type of watercolour paint should I choose?
Not only do you get to choose between watercolour tubes and pans, you also have to decide on brands and ‘quality’. By quality I mean that most paints declare themselves to be professional/artist quality or student quality.
Well known brands such as Schmincke, and Winsor & Newton offer both. Some people swear by choosing only the professional quality but in my experience the student versions, especially from these big brands are perfectly fine. Usually the difference is in the pigment ingredients with the more expensive paints containing higher quality pigments. Student quality paints can contain cheaper pigments and/or more binder.
Now price isn’t always the best indicator of quality. It is possible to find some paints that are inexpensive but still delightful to use. I took a little set of Crayola paints (yes, for kids - don’t laugh) on holiday because they were small and easy to throw into my bag. Those paints are joyful to use. Bright and happy and you don't have to worry about ‘wasting good supplies’ or other things that our inner critic tells us when we start learning to paint.
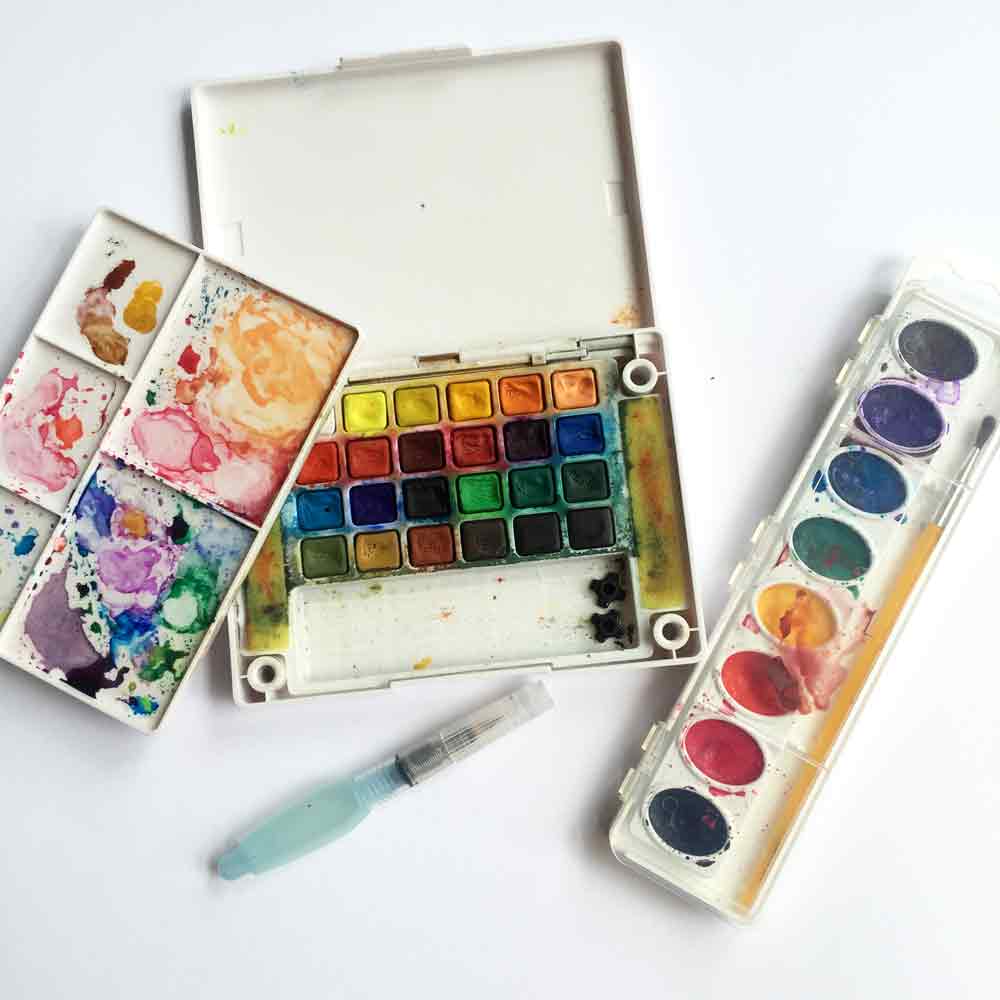
These are my no pressure watercolour supplies. Cheap and cheerful pan sets that - as you can see - get used a lot! My go-to favourite is my Sakura Koi travel set shown on the left, and the little Crayola set I mentioned is pictured on the right.
Having said that I tend to use those watercolour sets and other less expensive sets like them in my watercolour sketchbooks rather than for a standalone painting, but they are a great way to start.
My favourite in this category is my Sakura Koi travel set. It has lasted amazingly well and has so many wonderful colours to choose from.
So to sum up here, the artist quality or professional paints are going to be reliable and easy to work with. If it is too much of a stretch however, I don’t think you will feel much of a difference if you go for a student quality version such as the Cotman range from Winsor and Newton or the Schmincke Academie.
And don’t turn your nose up at a nice starter palette box like the Koi palette if you just want to dip your toes in the water… or is that watercolour…. See what I did there ...
Why aren’t all the colours in a watercolour paint line the same price?
One the subject of price you will notice that in the big ranges of tubes and individual pans that not all the colours are the same price. Typically they are in series, depending on the price of the pigments that are needed for each colour.
Some pigments are extracted from precious or semiprecious minerals and are expensive to extract. Often a manufacturer will figure out how to make a similar colour from synthetic pigments or a combination of cheaper pigments. You may find then that a colour that looks about the same is in two series eg cobalt blue and cobalt blue hue. The one that is labelled ‘hue’ is likely cheaper as it contains the less expensive synthetic pigments.
Technology has come a long way - don’t assume that the ‘hue’ is going to be dreadful, give it a go if you fancy the colour but not the price.
How many colours do I need to start watercolour painting?
Honestly? One!
Monochrome paintings are a thing - a good thing so really all you need is one colour. You could get started with just one tube of watercolour paint.
Don’t believe me?
Here’s a step by step tutorial showing you how to paint a swan with just one colour.
By increasing the amount of water you add to the paint you can make lighter and lighter versions of the colour. By layering multiple layers of paint (letting each dry in between) you can make darken some areas of the painting because watercolour is transparent.
But ‘need’ is a funny word. As in, how many pairs of shoes does a woman need…
You could opt for 3 primary colours red, yellow and blue and mix the others like you learned in kindergarten.
Or the more modern take on that - magenta, cyan and yellow like your printer. There is another article all about that here.
If you know that you love roses, for example, and are going to be painting mostly them, you could choose the colours you might need for that, like pinks, yellows and greens perhaps.
If you opt for a set they sometimes come themed with colours you might use together. See the examples I found below of sets themed for marine and landscape paintings.
If you are prepared to go for more than a few, then the next conventional wisdom is to get a warm (usually redder) and cool (usually bluer) tone of each of the primaries Eg an orangey red and a purpley red.
These days we are blessed with so many glorious colour options that on this I can’t really help you.
Suffice to say you only need one or maybe three, but you can bet on wanting a lot more….
Do I need black and white watercolour paint?
Watercolourists tend to avoid black and white - so these are not paints you usually find in your sets.
Black watercolour paint
Black can be a bit lifeless and deaden a painting. Instead watercolour painters usually opt to mix a nice interesting dark by combining colours. Mix all your primaries and see what I mean.
If you get a standard watercolour set with some of the more traditional colours you will usually get an ultramarine blue and a burnt sienna. Together, these make a lovely dark (blackish) colour.
White watercolour paint
The white parts of a watercolour painting are already there - they are the paper. Your job is just to paint the parts that are not white!
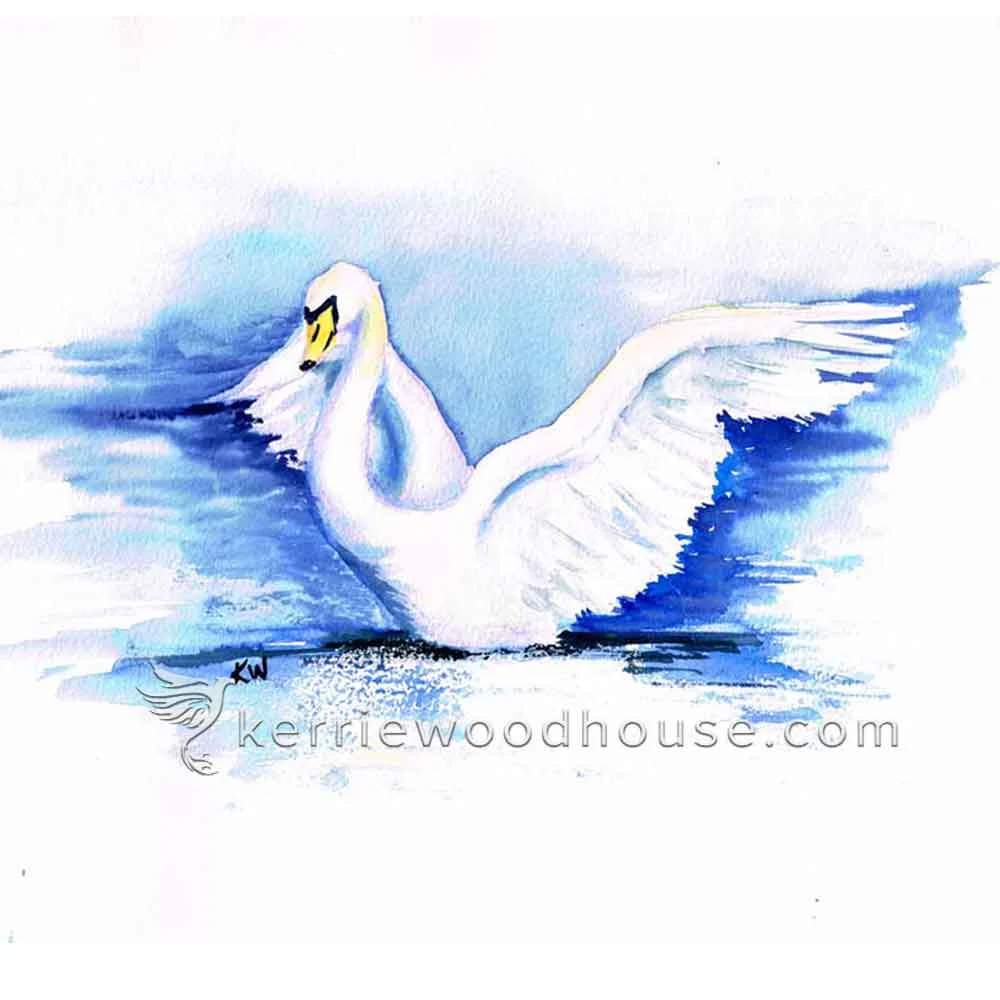
This white swan was painted in watercolour with no white paint at all. Click the image above to see more dramatic birds painted in watercolour.
At school you may have mixed pale colours by adding white to vibrant colours but in watercolour you use water to dilute them and let the white of the paper glow through the transparent colour to achieve the same effect.
Yes, this can be quite challenging.
Sometimes a painter might use white goauche (similar to watercolour paint but opaque) to add any highlights back in, but a purist would never dream of it. You do what you want to do. The rules are, there are no rules as far as I’m concerned. There are other ways to paint white things in watercolour, but that’s a story for another article.
Can I paint straight from the tube or pan?
Watercolour pans are dry so you need to add some water to transform them from a hard cake into something you can actually paint with. I find this is best done with a little spritz of water from a spray bottle. You can get a little mister bottle from most craft stores or you can repurpose something like an old hairspray bottle (not the aerosol kind obviously) as long as you rinse it out really, really well first.
I like to spritz a light mist of water over my whole paintbox and then leave it for 30 seconds or so to soften up a little. You could activate the dry pan by rubbing your wet brush into the colour you are going to use but I wouldn't advise this as it is hard on your poor paintbrush and quite tricky to control the amount of water you are adding.

In theory, you can paint straight from the watercolour tube,, but you would be missing out. Water is the magic ingredient! Whether you use tubes or pans, you will need to dilute the paint to get the most out of it. It is only in the presence of water that the watercolour paint can do its magical tricks.
If you are using watercolour tubes you will need to begin by squeezing out a little paint onto a palette. Then you can add a bit of water to the paint on the palette using your brush to get the consistency you are looking for.
Concentrated watercolour paint behaves differently from dilute watercolour paint. The most important thing to learn when you start watercolor painting is an understanding of how the ratio of paint pigment to water will alter the results of your painting.
So either way you will need a palette for your watercolour painting. Which raises the next question….
What kind of palette do I need to paint with watercolour tubes and pans?
If you choose a pan set it will most likely come with some sort of palette built into the box. If you don’t see an obvious palette (ie plastic or metal tray with sections) then use the lid.
The sections can be helpful in keeping your paint colours separate. This is important because if you have something like a red and a green on your palette and they end up mixing together you will end up with a disappointing muddy brown grey. (Actually this is not always disappointing, but for now let’s just stay on track.)
If you don't have sections, never fear! You can keep the puddles of colour distinct by spacing them far enough apart on your palette. If you ever run out of room you can always clear a space by spraying a section you aren’t using anymore with water and wiping it clean with a paper towel or old rag. This is a tremendous advantage of watercolour I think - easy instant clean up!
You can also use a separate palette. You can buy a plastic or ceramic palette in the art store, but you don’t need to. An old plain ceramic plate or a disposable plastic plate will work just as well. And you can buy pads of palette paper that are handy too.
Ceramic palettes are smooth and clean to work from but have no lid for easy storage at the end of your painting session.
Large lidded palettes have lots of mixing area and are easy to close up when you are finished painting. The downside is storing the large flat surface area that this style of palette takes up.
Palette paper is handy to have as you can just tear off the sheet when you are done painting and throw it away. I find this is more useful for acrylics and oils as watercolour is very easy to clean up.
I have also used acetate sheets - the kind we used to use for overhead projectors… gosh, remember those…
If you choose watercolour tubes then of course all of the above suggestions for separate palettes apply. But I do have another suggestion for you which I consider to be the best of both worlds when it comes to tubes and pans…
Best of both worlds - create a custom watercolour palette
For me, the best of both worlds is to create a custom palette box. When I decided to get some good quality professional watercolours I opted for a set of Schmincke pans in a metal palette box tin. It was a bit of an investment but I have never looked back. It is one of those tins that contain metal rods that hold the little white plastic pans. My set came with 24 colours, I think, but I chose it in the 48 size tin. To start with I had many colours to choose from, but I also have the option of adding more as time goes on.
You can find metal tins that are completely filled with pans or some with empty spaces allowing you to expand your palette when you are ready.
You can buy empty white pans and fill them with paint, or you can buy the little pans with the watercolor paint already inside. This means your paint selection can grow with you. You can also rearrange the order of the paints by shuffling the little pans around. So many options….
I tend to refill my used pans with tube watercolours rather than buying the little filled pans again because it is a fair bit cheaper. I can refill a pan many times from one tube of paint. I also tend to mix it up and try different brands of paint. I really can’t think of a paint supply that gives you so many options in such a compact way.
You can’t beat watercolour when if comes to no mess no fuss painting.
But what if you are starting out and are not ready to make the investment?
You can have the same sort of system without shelling out for the fancy metal tin with adjustable pans. There are many great paint boxes available. They are usually plastic and come with a lid and or the extra palette tray/mixing space. The only downside is that the little wells for the paint are fixed which means you won't be able to move them around, but honestly that is no big deal.
There are many plastic palettes like these available. Look for a nice sturdy box with a lid and you can’t really go wrong. The little wells are fixed so you can’t move the colours around easily but that’s not too much of an issue in my opinion.
I would suggest choosing a couple of tube colours and filling up a well in the plastic box with each one. The paint will dry into a cake format over a day or more, depending on the brand. Then you can spritz it with water then next time you are ready to paint and it will spring back to life. You can add new colours to your palette as and when you need them.
How to start painting with watercolour
Ok. We have a palette and some watercolour paint. What now?
Well you do need a nice soft brush (not a bristly, inflexible one - those are for oils) and some paper. The paper is very important - you do need to have paper that can cope with the water. I recommend 300gsm cold pressed watercolour paper. This article will tell you all you need to know about paper.
If you have never painted before then I suggest you have a go at just playing with the paint and getting used to how it behaves on the paper. Aim for a nice messy colourful page - what fun!
We have already established that you need water to see watercolour paint at its best. To paint anything you need to start with wet paint. There are two main watercolour techniques to have a go at:
Wet on dry
Try applying some wet paint onto dry paper - that’s what the name of this technique is referring to. Watercolour paint moves in water. So if you apply it to dry paper it will only go where you put it. If you want more control over your watercolour paint, this technique will help with that.
Play and experiment with this wet on dry technique:
Paint with concentrated, undiluted paint
Paint with very very dilute paint - much paler, isn’t it?
Paint with Goldilocks style just right paint… it will take some experimentation to find where this is for you
Use your brush in different ways to see how many different marks you can make with one brush, eg
hold it perpendicular and paint with just the tip making a fine mark,
squash the brush flat to the page and paint with the ‘belly’ making a big juicy wide mark
Alternate the pressure to see if you can make a fat mark that tapers to thin and vice versa
Drag the brush over the paper to see if you can make a different mark
Dab the brush repeatedly to see if you can make a sort of stippled dotty effect
Any other mark making variation you can think of
2. Wet on wet
This is my favourite technique. Instead of starting with dry paper, take a clean brush and dip it into your water. Paint a little puddle of clean water on your dry page. Now you can choose a colour to put your brush into. Touch the paint to the wet page and watch it spread - isn’t that glorious?
Play and experiment with this wet on wet technique:
Try a very wet clean puddle on the page and drop in a bit of colour
Make a clean puddle but wait a bit so that the water soaks into the page before you add the colour - compare your results with the first one and try different lengths of drying time
Try more than one colour on your wet (more like damp) puddle and watch them blend
Paint some of the marks you learned to make in the wet on dry section on damp paper and compare the difference - see how you lose the distinct edges?
Paint a puddle of colour onto the page and then drop in another colour. This is still wet on wet, it’s just wet colour instead of wet clean paper
Try dropping clean water into a puddle of damp colour and wait to see the effects it makes. Don’t push the water about - just let the paint and water do its own thing to see what happens.
And then do it again but do push the water about - compare the different effects.
So much fun, right? But I bet you want to paint an actual thing now, don’t you? Good for you - go right ahead!
If you would like a little more help with that I have a whole class for beginners about collaborating with the paint. Want to see?
What do I do with leftover watercolour paint in my palette?
One of the very useful properties of water is that it reactivates with water. So any leftover paint on your palette can be used in your next painting session simply by rewetting it.
My palette is often a huge mess but I like it that way. I feel like I am just picking up where I left off rather than starting something brand new. I find that makes it easier to get back into the swing of things.
Also, I have a problem with waste. Cleaning off the palette at the end of the session is easy and of course if you like things that way of course you could do that. (Remember, all you need to do is wipe it clean with a damp cloth or paper towel.)
I find that if I know I can use all of the paint in the mixing wells of my palette in another painting, even on another day, then I can be more bold with the colour in this painting.
And that is what I like, bold, liberated painting - how about you?
What characteristics of watercolor paint do I need to know about?
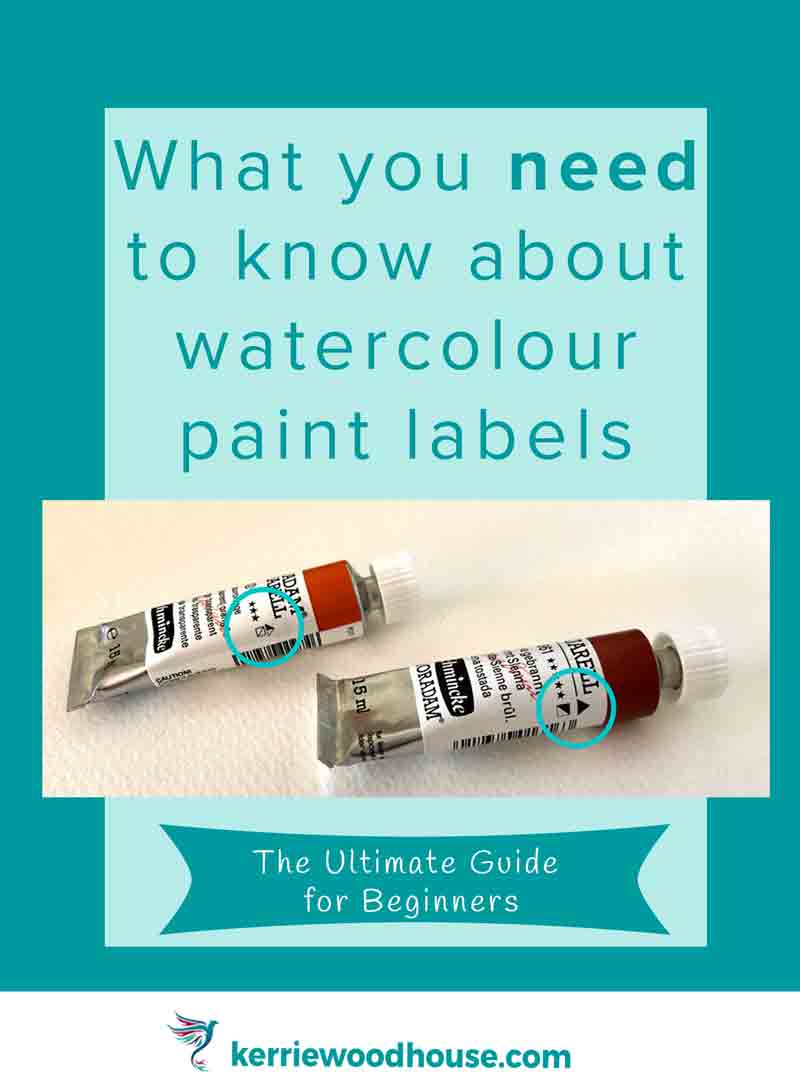
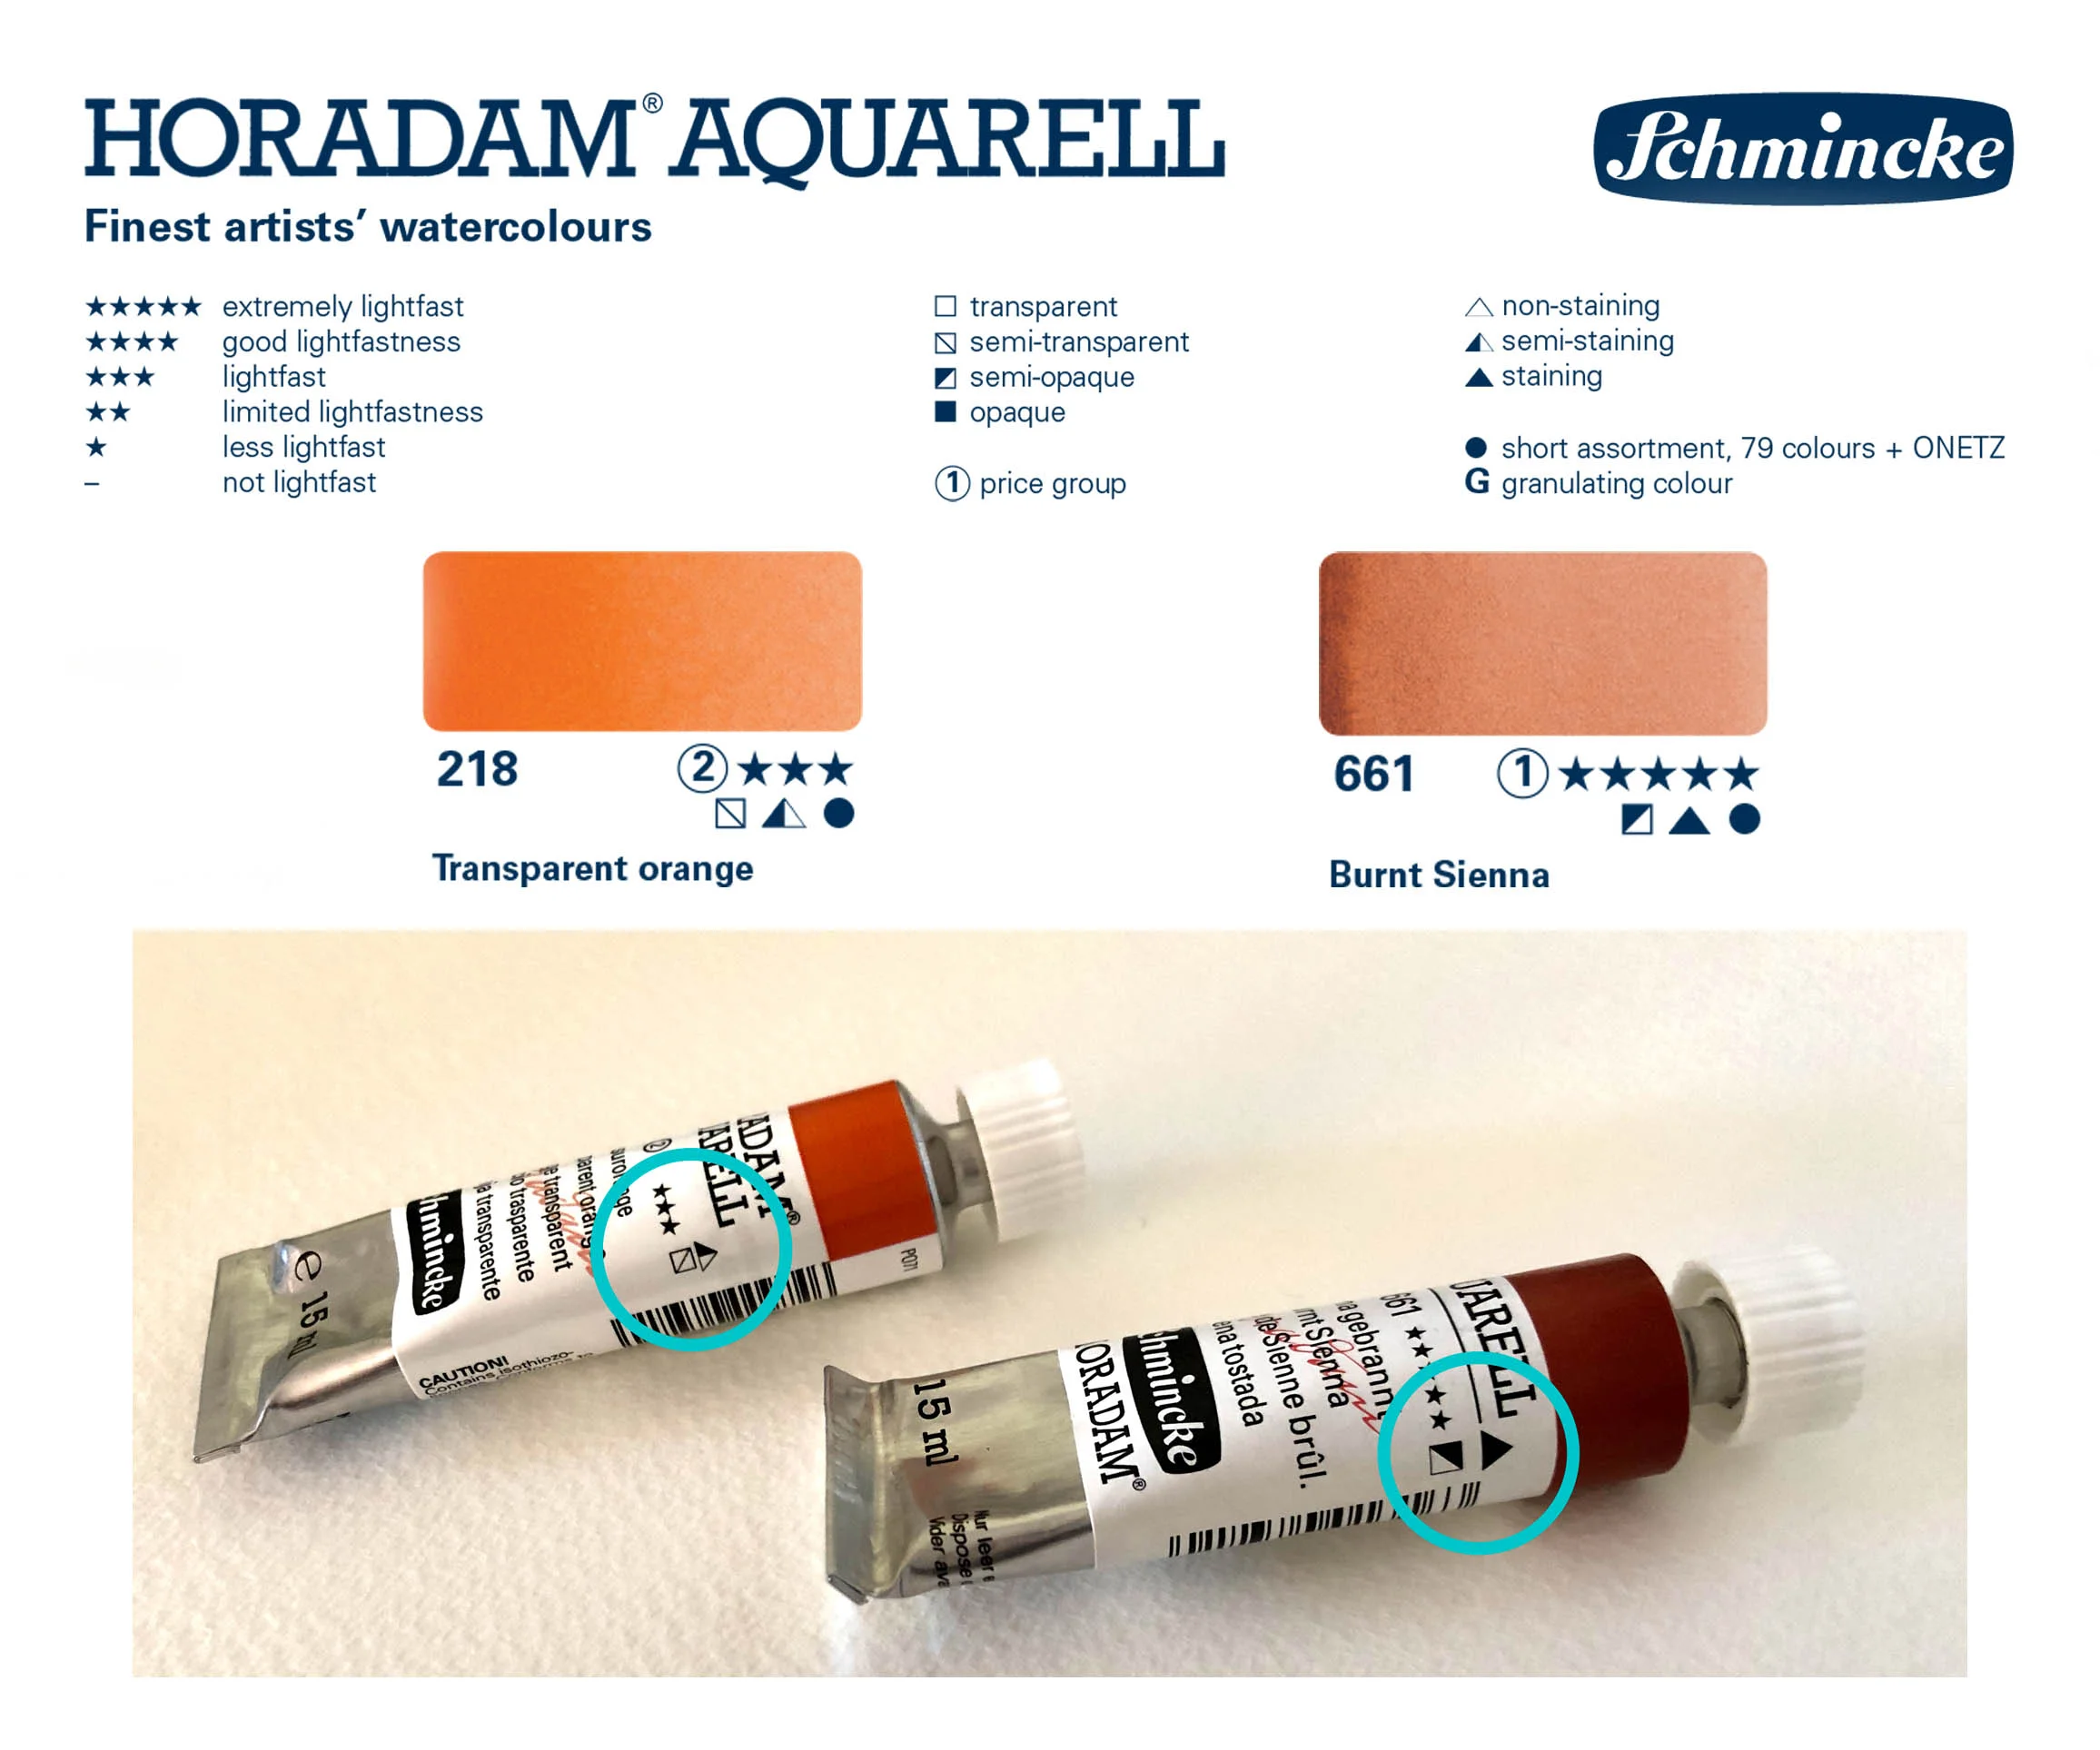
You will probably notice a lot of little symbols on the labels of watercolour paint tubes and pans. These give you information about the important characteristics of each colour. Different brands use different symbols but they are usually circles and triangles and squares that are empty, completely filled in or half filled in.
These are the properties and characteristics that they represent.
Transparency
One of my favourite properties of watercolour paint is transparency. The bright colours are laid like a sheer veil over the paper letting the white of the paper glows through. Paints can be layered in the same or different colours and when they are transparent you will see the underneath layer through the top layer. That means you can achieve colour mixing without actually mixing the paint.
But not all watercolour paint is transparent. Some are only semi transparent and some are opaque. I have one or two opaque or semi transparent colours but I favour the transparent ones. If you find that you prefer the opaques you might want to look into some gouache which is like opaque watercolour. But watercolour is the best… obvs…
Granulating
Some paint pigments blend smoothly and evenly in the water giving you a uniform colour. Others do not play quite as well with the water and separate from the binder when diluted. The pigment grains then settle into the ridges of the paper leaving a grainy texture.
This can leave you with some really interesting variation in your painting - if that’s your thing. If not, stick to pigments that are described as non-granulating.
Staining
While watercolour paint is wet you can ‘lift’ it out. This means that either with a clean brush or a rag or paper towel you can blot the damp paint and it will come clean off the paper. Only that is, if it is a non-staining colour.
A staining colour does what it says on the package and will leave a hint of itself on the paper. You could lift it out on purpose knowing that it will leave a subtle version of itself there on the paper. But if you are trying to lift it out because you changed your mind then this will only be possible with the non-staining pigments.
There are a few colours with very persistent pigments. My art table is white (okay formerly white). It is now spattered with some very vibrant pink splashes which no amount of household bleach will remove. Schmincke Brilliant Pink…. If you are wondering….
Archival, lightfast and fugitive
You will often hear of art supplies as being described as archival. This means that they are likely to stand the test of time and will not deteriorate. If you are a beginner, then I don’t think this is a primary concern and may not be worth the higher price tag for the paints when you are just learning. Student quality paints are less likely to be archival.
Similarly, some art materials are described as light fast, or non lightfast. This is describing the likelihood of deterioration of the paint when subjected to light. A good example is Opera Rose by Daniel Smith. Nearly everyone adores this colour, but some try not to use it because it is not lightfast. Another word for colours like this is fugitive.
Fugitive colours are to be considered temporary. They may change over time, meaning that if you use them in your masterpiece it may not look the same in the years ahead. When you are starting out I don’t think you should worry overly about this sort of thing, but I would hate to leave out a piece of information that you may need.
Colours with names like ‘permanent’ and ‘new’ and paints with a high lightfast rating (these are usually in Roman Numerals so you are looking for I or II) are your safest options if this is a concern to you, as is sticking with the professional or artist quality paints.
If you go to the manufacturers website you will be able to find a colour chart with a key to all the symbols they use. This one is an extract from the Schmincke chart.
So there you have it - all you need to know about how to paint with watercolour tubes and pans. Watercolour is available in other forms too, these days. This link will take you to another article all about the different types of watercolour that you might want to try.
Want a free class on beginner watercolour supplies?
I’ve got you covered…

If you would like some help with your first painting project, one of these might just be for you.


Keep on reading….


