4 Techniques for Creating Texture in Watercolour Painting
There are many ways to incorporate glorious texture into your watercolour backgrounds. Its part of what gives watercolour paintings so much life and interest!
Here are 4 of my favourite techniques for adding watercolour texture.
Three of them are about learning how to get the most out of your supplies and choosing the right tools for your desired effect.
The last is quite a lot of fun - using something you are sure to have in your house already.
Watercolour Texture Technique #1: Embrace the Cauliflowers and Blooms
Many of the painters that find watercolour frustrating are those that try very hard to eliminate the much maligned cauliflowers and blooms.
Cauliflowers and blooms are the watermarks that can often appear in your watercolour painting, usually just where the earnest painter does not want them.
I do understand that having a bloom appear in your flat wash can be upsetting but to be honest I find most flat washes a bit boring.
Personally I try to encourage these marks. I find them so beautiful.
I have a whole lesson about these cauliflowers and blooms in this introductory Watercolour class if you are interested.
Cauliflowers, blooms or backruns are all names for the marks that are created when water or a dilute wash is dropped into paint that is not quite dry. The pigments are pushed aside by the new water and collect at the edge of the water droplet. This creates a dark mark of collected pigment in the shape of the water droplet. Sometimes the water moves in random and unpredictable ways creating fascinating shaped watermarks. This mark can look like a cauliflower - hence the name.
So my first suggestion for a painter looking to add texture is to stop trying so hard to control the paint. Forego the flat wash and let the paint drop into the background in varying concentrations. This can be a wonderful way to paint a cloudy sky, a rocky path or simply some abstract shapes in a soft focus style background to the main painting subject.
Watercolour Texture Technique #2: Choose Granulating pigments
If you want to make more of this effect you can select the most granulating colours in your paintbox. A granulating pigment is one that does not dissolve smoothly into the water but leaves little visible specks as the pigments separate in the water.
You will find that each colour tends to have its own personality. Some are bossy and whoosh forcefully into their neighbours. Some separate and granulate. And some just quietly settle into an even wash of colour. Cheaper pigments tend to have little or no granulation so if this is something you like, you will likely have to invest in some higher quality pigments. Daniel Smith’s Prima Tek range might be a good thing to investigate.
Some favourite granulating watercolours in my own collection include:
Cascade Green by Daniel Smith
Indian Red by Schmincke
Moonglow by Daniel Smith
Experiment with your current selection to discover the granulating colours that you already have.
You will also find the labels on the higher quality paint brands will include information on the degree of granulation for each of their pigments. This information is usually also available on the colour charts on each paint manufacturers websites.
Watercolour Texture Technique #3: Choose Rough Paper
Watercolour paper makes such a difference to your painting experience.
Just like the paints, the paper has its own particular characteristics. If it is texture you are after, then choosing to paint on a textured surface is clearly a good idea.
Since watercolour is a transparent layer of colour that sits on the painting surface the texture of the paper itself is an intrinsic part of the whole effect.
Watercolour paper comes in a variety of textures.
By the way, if you want to learn more about each of the watercolour supplies, I have a whole class on that. It’s free and you can sign up below!
The Beginner’s Guide to Watercolour Supplies
Hot Pressed Watercolour Paper
Hot pressed paper has the smoothest surface. Think of paper that has been flattened out with a hot iron. This surface is favoured by illustrators who need clean lines.
I would suggest avoiding this paper if you are looking for a painting with texture!
Cold Pressed Watercolour Paper
Cold pressed or NOT is slightly textured. Some manufacturers describe this as medium texture. This is my go to paper - my favourite painting surface for watercolour.
Rough Watercolour Paper
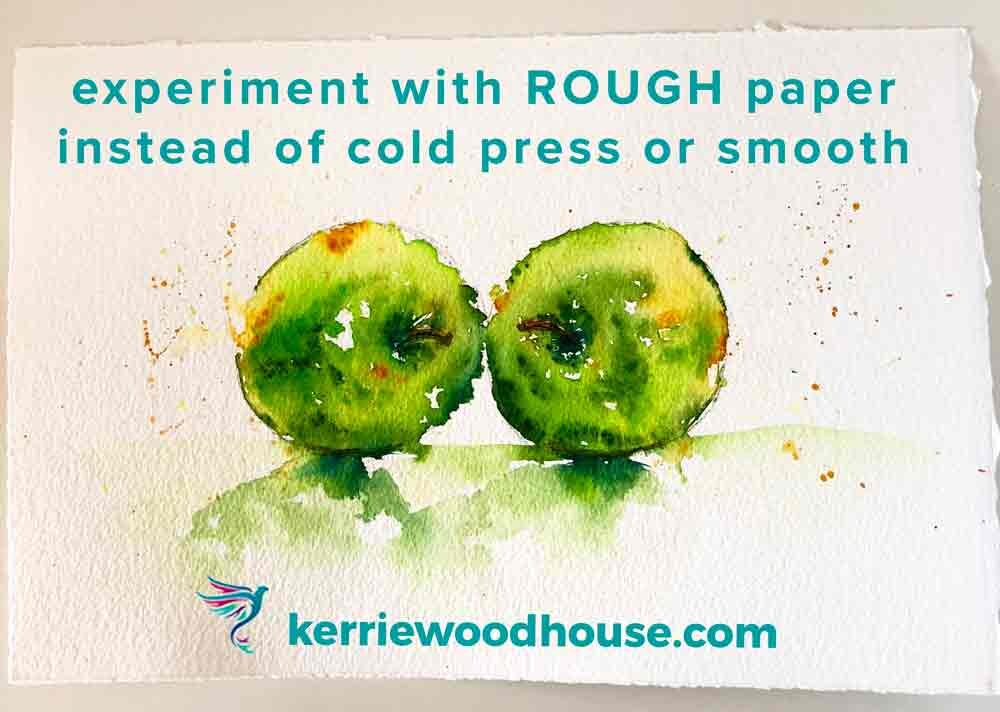
Rough paper is the most textured surface available. If you want to take your texture game up a notch this is the one for you. The very rough surface means that clean precise edges are not likely to be achieved so it is a great way to help loosen up your painting, if that is something you are interested in.
Make the most of this texture by incorporating some dry brush technique into your painting.
Wth watercolour painting, clearly the paint is always going to be wet, but what the name is getting at is that the mix of paint and water is a strong concentrated one.
That means that with a swift bold stroke of the ‘dry’ brush the paint will catch on only the raised sections of the textured surface. Since the paint is not very dilute it doesn’t flow as freely and does not run into the little valleys in the textured surface of the paper. Instead, these little sections remain white. This can leave a charming effect like sunlight rippling across the surface of the sea.
Want to paint a swan with this technique and just one colour? Here’s a step by step tutorial…
Watercolour Texture Technique #4: Create Watercolour Texture with Salt
Yes, regular old table salt.
This is a fun technique.
Generously cover the area of the painting where you want the salt texture. While the paint is damp, sprinkle in some salt and then leave the painting to dry completely, preferably overnight.
The salt will draw the moisture from the paint mix leaving the pigments behind in a lovely crystalline pattern. When the painting is completely dry you can carefully brush the salt from your painting to reveal this subtle texture.
You can use any kind of salt for this and the result can vary depending on your choice. Fine table salt leaves a small subtle texture. Rock salt will leave larger shapes. Experiment and see what you can create!
If you want to do a painting using this technique and would prefer step by step instructions you might be interested in this BEACH VIBES tutorial.
Want to paint more beach scenes?
How about 4 tutorials for less than the price of 3?
Are you on your own painting journey?
One of these might be useful…


